If you’ve ever wondered whether to click "Normalize" or "Optimize" while working in DaVinci Resolve, you’re not alone. Although they sound similar, these two tools serve completely different purposes—and knowing when (and why) to use each can improve both your editing speed and audio quality.
What Does “Normalize” Mean in DaVinci Resolve?
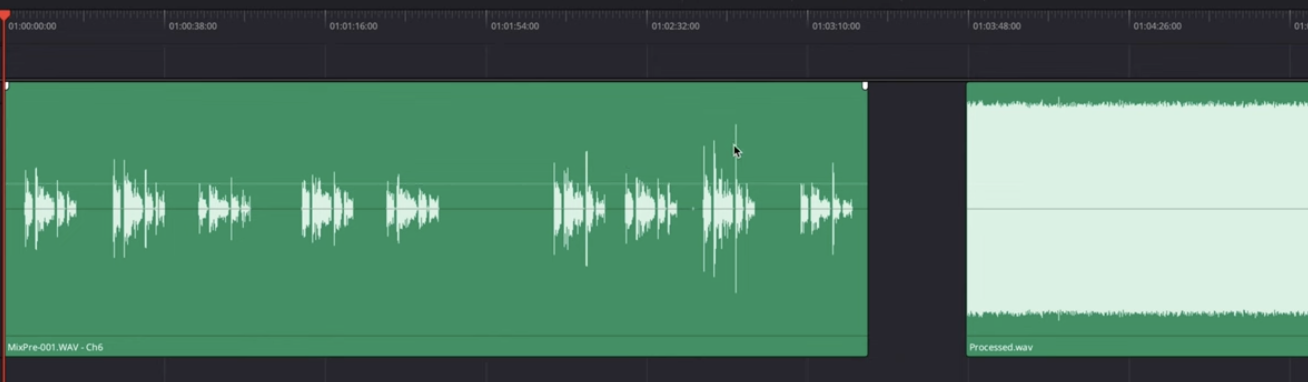
Normalize refers to audio normalization, a process that adjusts the volume of an audio clip so that its loudest peak reaches a specified target level—without distorting the sound.
💡 Think of normalization as automatic volume correction.
What Normalize Does:
- Makes quiet audio louder (or loud audio softer)
- Brings audio to a consistent peak level
- Useful for voiceovers, dialogue, interviews, and balancing clips
- Keeps the dynamic range intact (unlike compression)
How to Normalize Audio in Resolve:
- Right-click an audio clip on the timeline
- Choose Normalize Audio Levels
- Select a mode:
- Sample Peak (measures loudest sample)
- True Peak (more precise, includes inter-sample peaks)
- LUFS (for loudness standards, ideal for broadcast or YouTube)
- Set your target level (e.g.
-1 dB,-14 LUFS) - Click Normalize
🎯 Use LUFS if you're publishing online (e.g., YouTube recommends ~-14 LUFS).
What Does “Optimize” Mean in DaVinci Resolve?
Optimize Media refers to creating proxy or optimized versions of your original video files—lowering their compression or resolution to improve editing performance.
💡 It’s like making a lighter copy of your footage so Resolve runs smoother.
What Optimize Does:
- Creates optimized, edit-friendly files (ProRes, DNxHR)
- Reduces strain on GPU/CPU when working with heavy formats (H.265, RAW, 4K+)
- Makes timeline scrubbing and playback smoother
- Doesn’t affect export quality—only used during editing
How to Optimize Media in Resolve:
- Select one or multiple clips in the Media Pool
- Right-click > Generate Optimized Media
- Make sure your optimized media settings are set up in:
- Preferences > Media Storage > Optimized Media Format
- Choose a codec like DNxHR SQ or ProRes 422 Proxy
- DaVinci Resolve will generate lighter versions behind the scenes
- Enable playback via Playback > Use Optimized Media if Available
🔁 You can delete optimized media later without losing your project.
If your timeline still struggles after generating optimized media, check out our complete guide on how to fix laggy playback in DaVinci Resolve for additional ways to boost performance and make editing smoother.
🔍 Normalize vs Optimize: Feature Comparison
Want to Go Deeper with DaVinci Resolve?
Understanding normalize and optimize is just the start. Learn how to edit faster, color grade professionally, and optimize your workflow inside DaVinci Resolve.
👉 Start learning with our DaVinci Resolve course.
FAQ DaVinci Resolve Normalize vs Optimize
Can I normalize video clips?
No. Normalize only applies to audio. For video-level adjustment, use Color > HDR tools or Edit > Clip Attributes.
Will optimizing media reduce export quality?
Not at all. Resolve always exports from your original high-quality source, unless you manually set it to use proxies during delivery.
Is normalization the same as compression?
No. Compression reduces the dynamic range. Normalization simply raises or lowers the overall volume without compressing.
Should I normalize or use Fairlight tools?
Normalization is great for quick fixes. For advanced balancing, mixing, and ducking, switch to the Fairlight page.