

Adjustment layers in Adobe Premiere Pro are an indispensable tool for video editors. They allow you to apply effects like color correction, blending modes, or transformations to multiple clips simultaneously, saving time and ensuring consistency across your project.
What Is an Adjustment Layer in Premiere Pro?
An adjustment layer is essentially a transparent overlay that sits on top of your clips in the timeline. Any effect applied to the adjustment layer will affect all clips below it. Unlike directly applying effects to individual clips, adjustment layers allow you to modify and test effects globally, saving time and effort.
How to Add an Adjustment Layer in Premiere Pro
Step 1: Create an Adjustment Layer
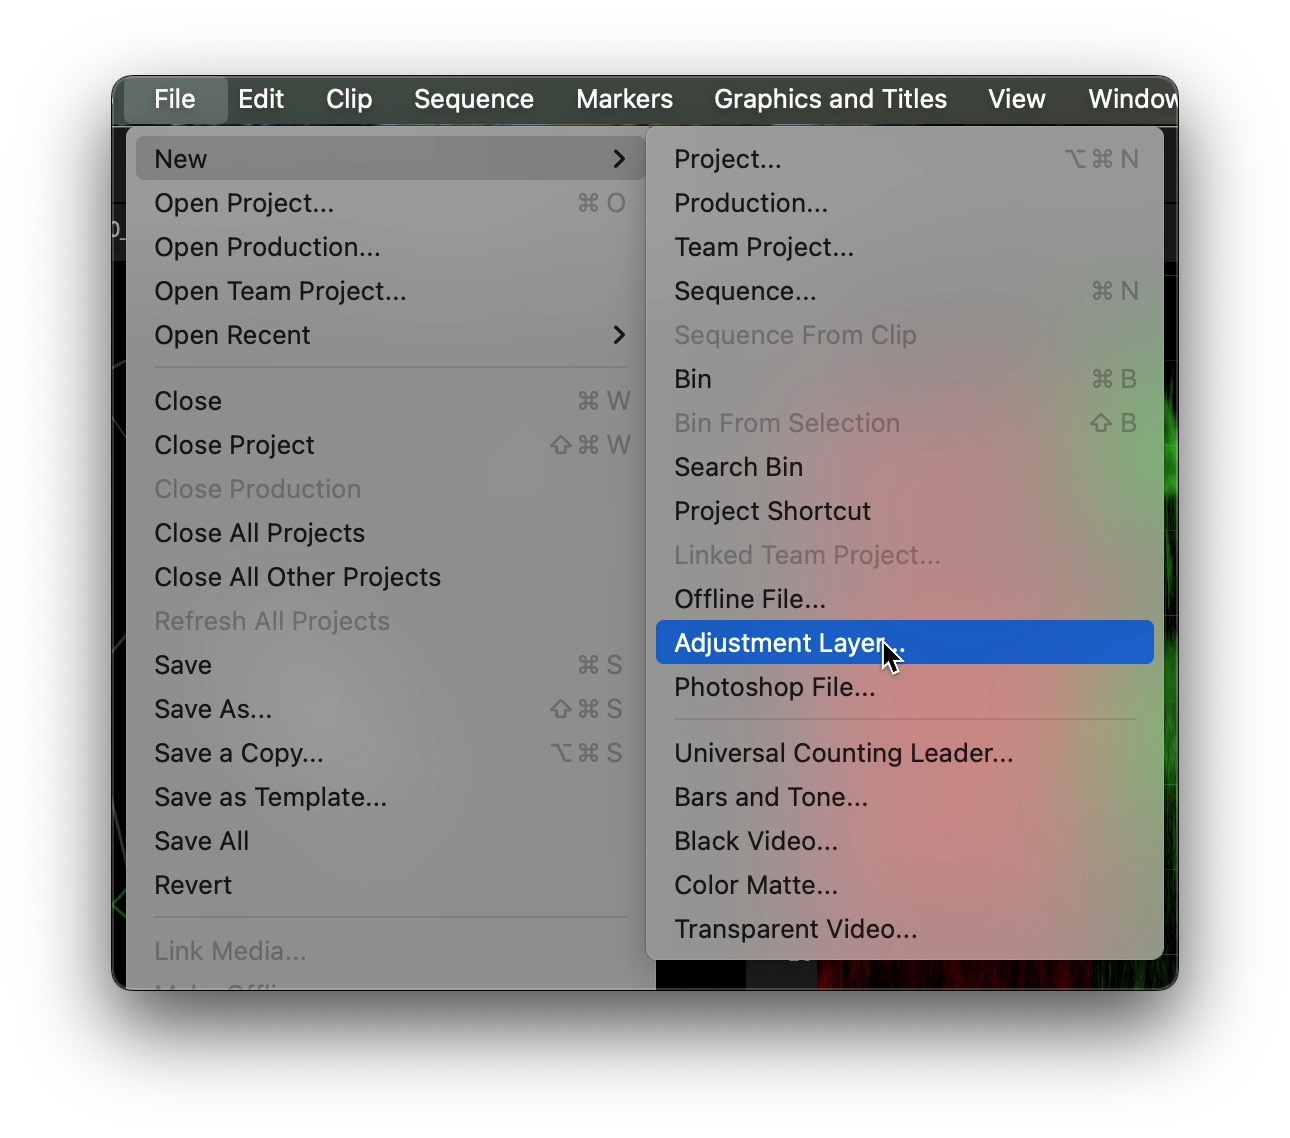
- Go to the top menu and select File > New > Adjustment Layer.
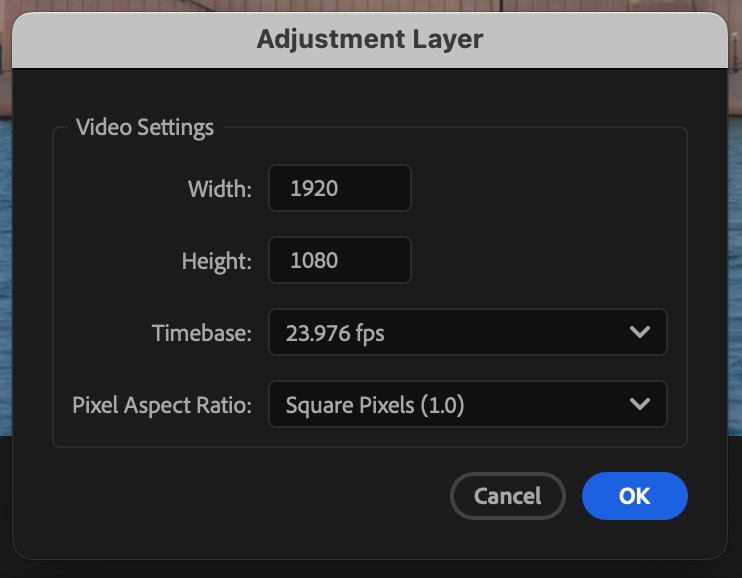
- In the Video Settings dialog box, ensure the resolution and frame rate match your sequence settings. Premiere Pro will often match these automatically.
- Click OK to create the adjustment layer.
Pro Tip: Save a preset adjustment layer in your Premiere Pro library for future projects.
Step 2: Add the Adjustment Layer to the Timeline
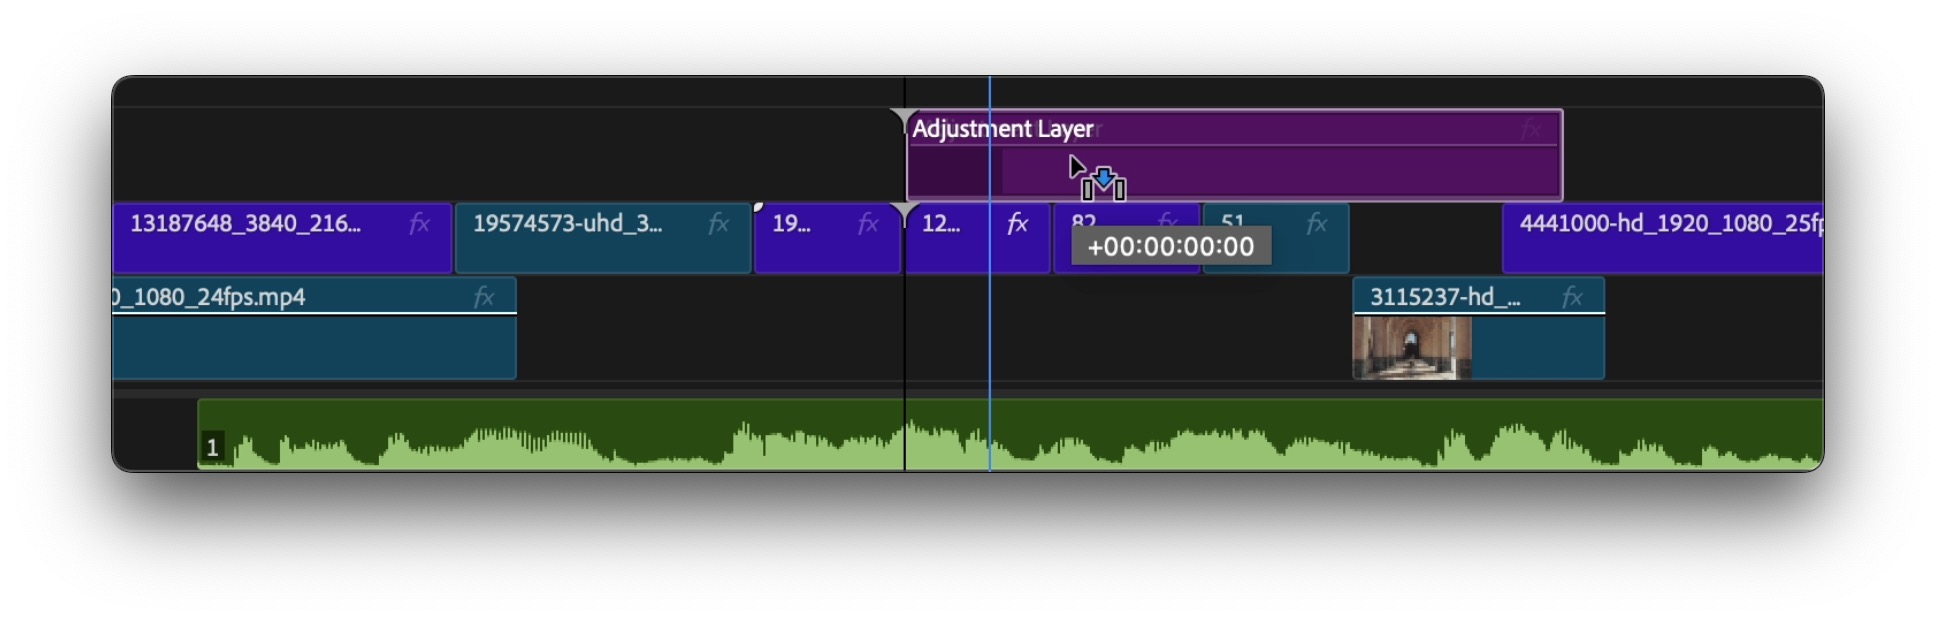
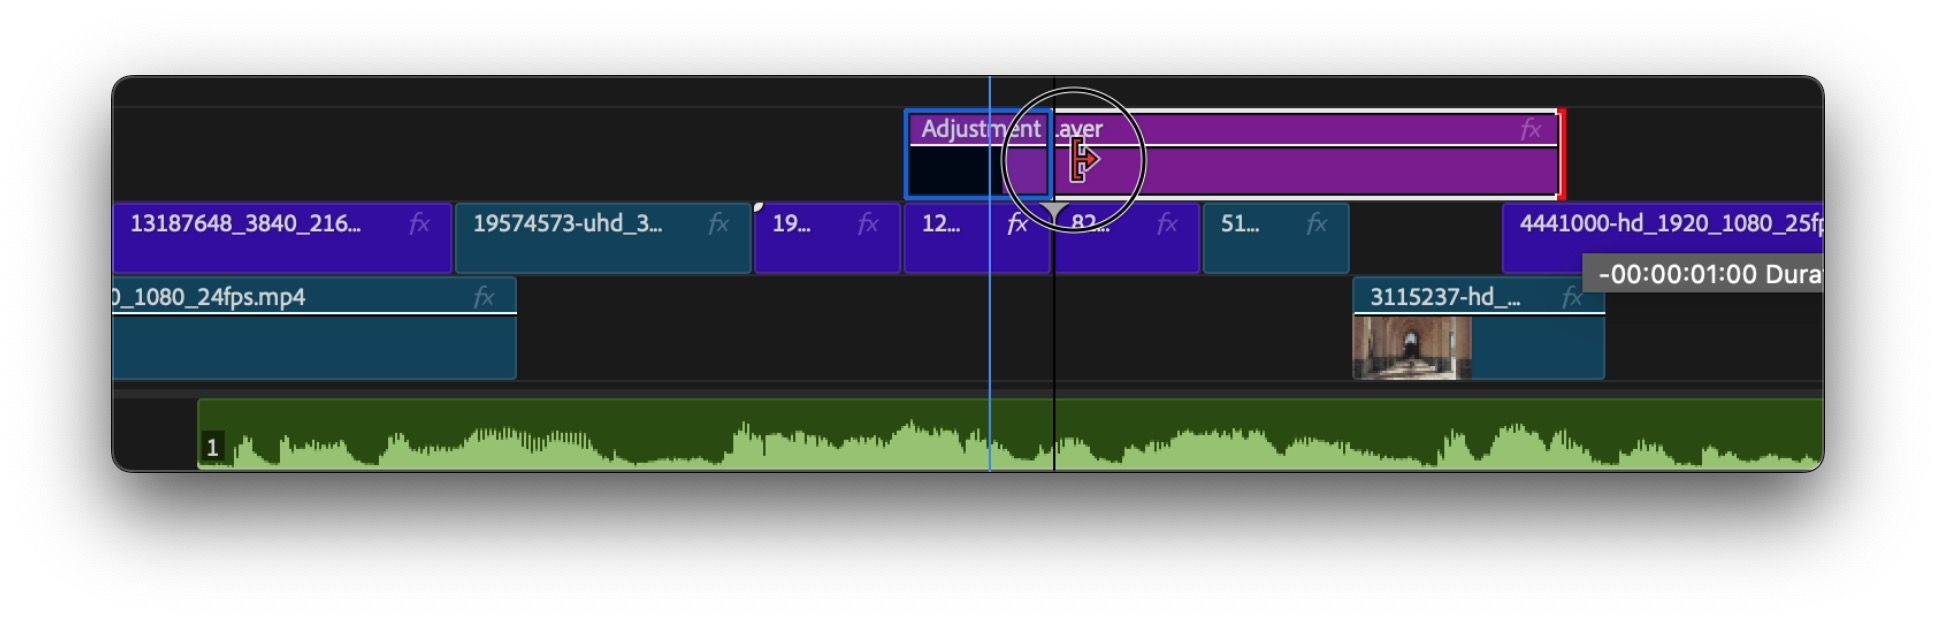
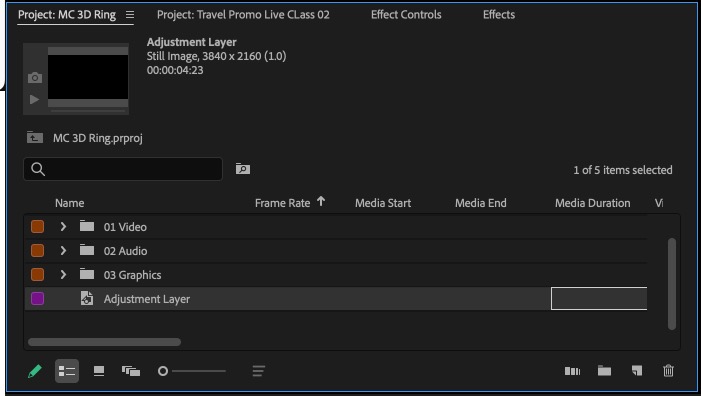
- Drag the adjustment layer from the Project Panel onto a video track above the clips you want to affect.
- Adjust its duration by dragging the edges to match the clips you want to modify.
Applying Effects to an Adjustment Layer
Once your adjustment layer is in place, you can start applying effects to it.
Step 1: Open the Effects Panel
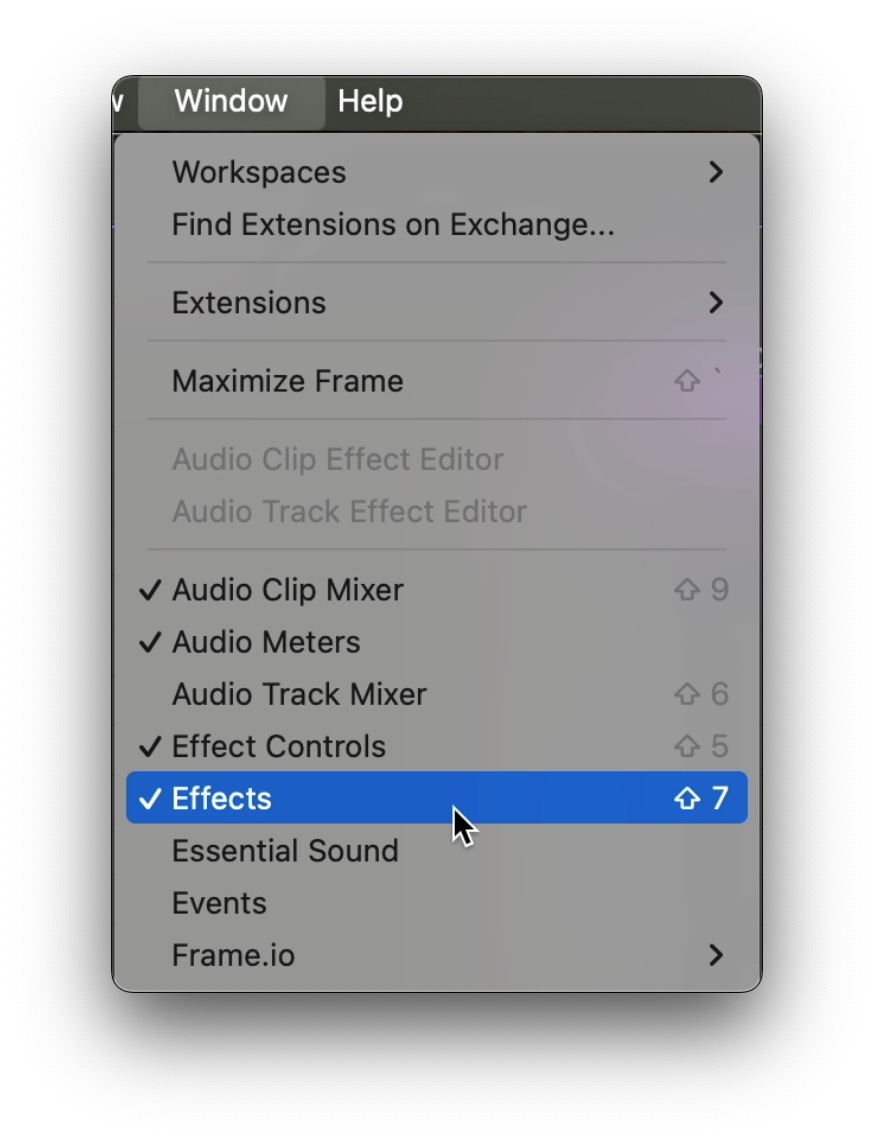
- Go to Window > Effects to open the Effects Panel.
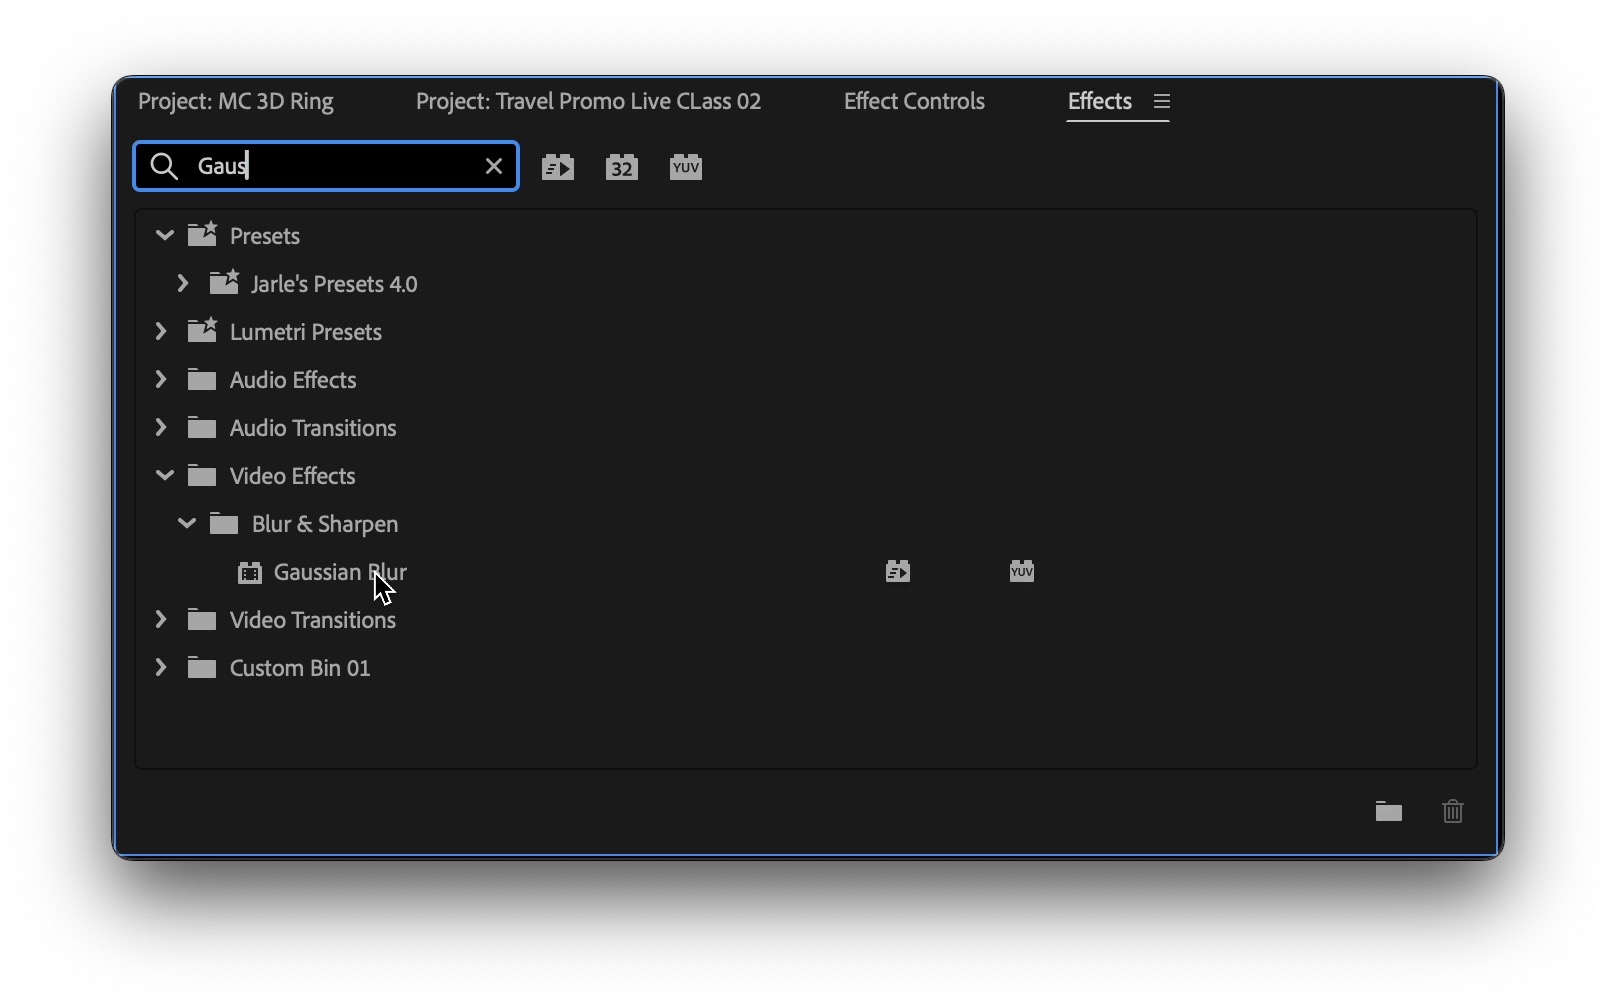
- Use the search bar to find an effect, such as Lumetri Color, Gaussian Blur, or Transform.
Step 2: Apply the Effect
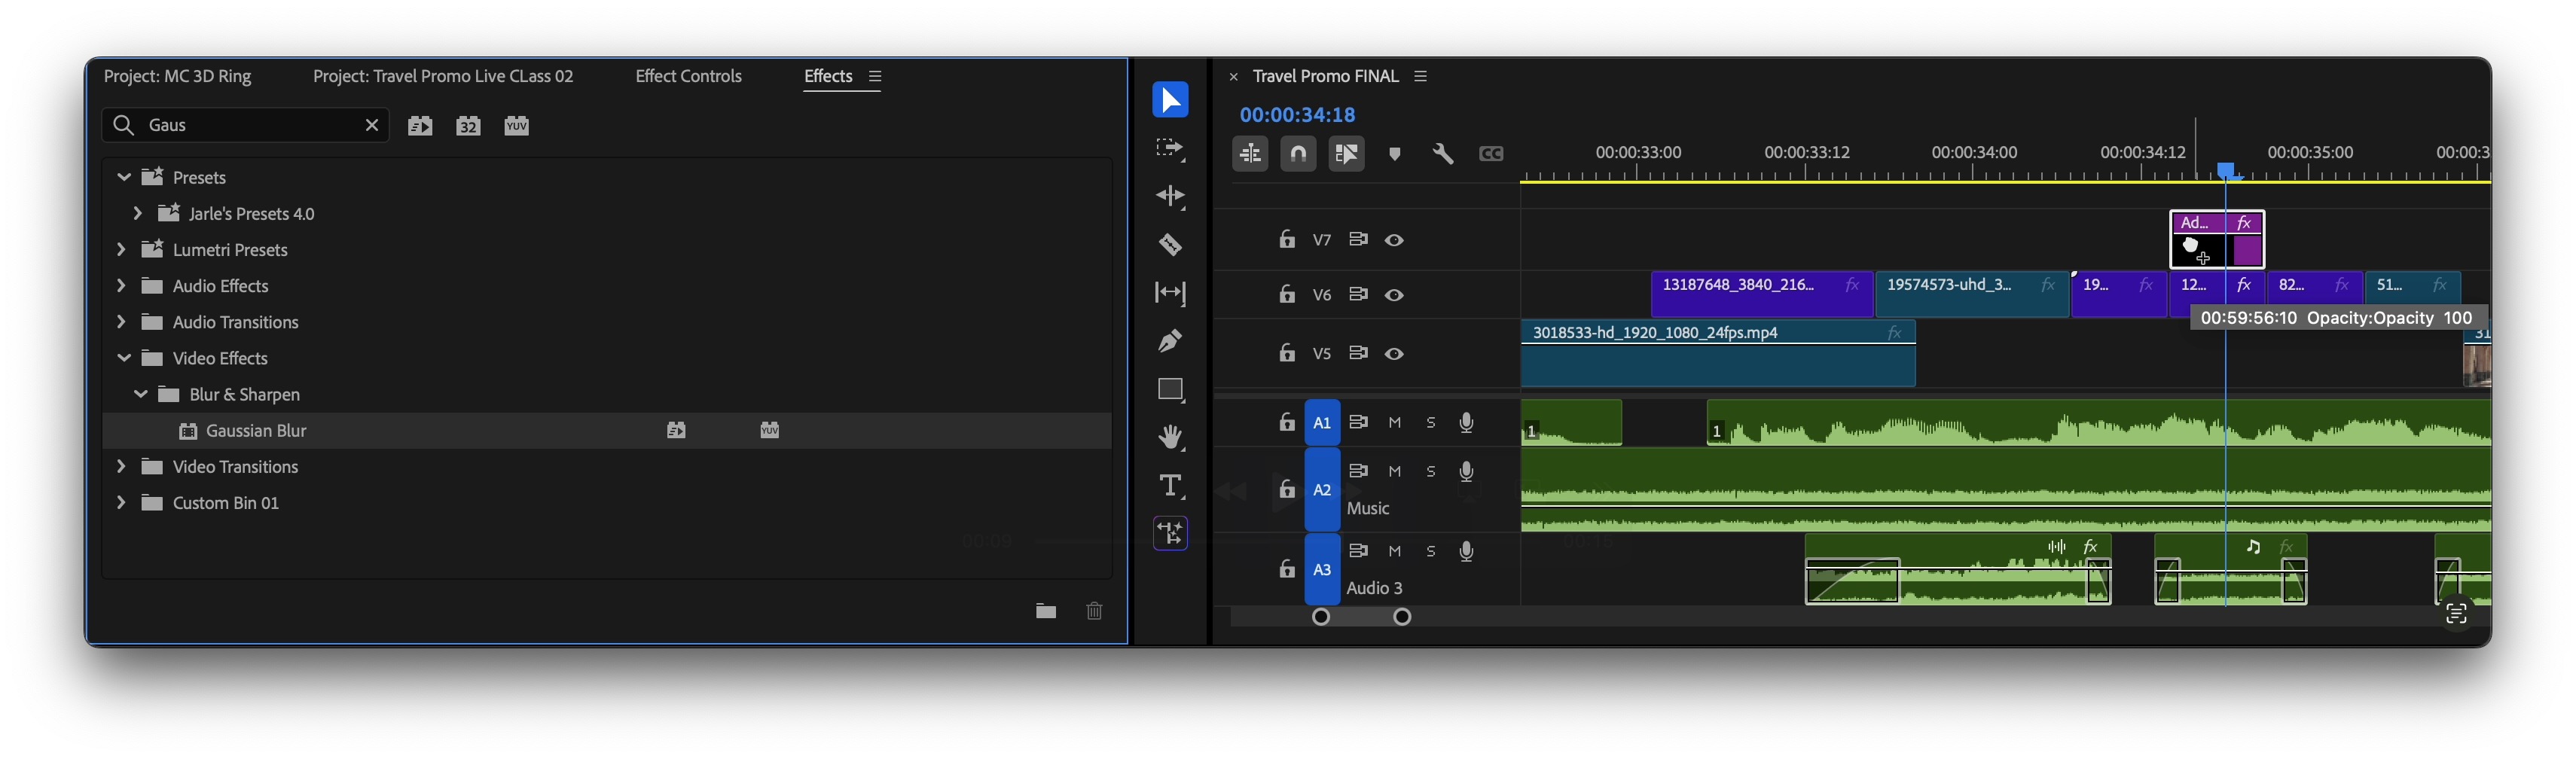
- Drag the effect from the Effects Panel onto the adjustment layer in your timeline.
- Open the Effect Controls Panel (Shift + 5) to customize the effect settings.
Step 3: Preview the Effect
- Play back the sequence in the Program Monitor to see how the effect impacts the underlying clips.
- Tweak the settings in the Effect Controls Panel as needed.
Advanced Techniques for Adjustment Layers
Color Grading with Adjustment Layers
Adjustment layers are perfect for global color grading:
- Apply the Lumetri Color effect to the adjustment layer.
- Use the Basic Correction tab for general adjustments like white balance and contrast.
- Fine-tune highlights, shadows, and saturation in the Color Wheels & Match section.
Pro Tip: Use separate adjustment layers for color correction and creative color grading to keep things organized.
Motion Effects and Keyframes
You can use adjustment layers to animate transformations across multiple clips:
- Add a Transform Effect to the adjustment layer.
- Use keyframes to animate properties like position, scale, and rotation.
- Preview your animation for seamless transitions across clips.
Blending Modes and Masks
Combine blending modes with masks for unique effects:
- In the Effect Controls Panel, select a Blending Mode like Screen or Overlay.
- Use the Mask tools to isolate the effect to a specific area of the frame.
If you want to refine the framing of your clips while working with masks, here’s a complete guide on how to crop videos in Premiere Pro.
Creative Ways to Use Adjustment Layers in Premiere Pro
Adjustment layers in Adobe Premiere Pro are more than just tools for efficiency—they're a playground for creativity. By exploring innovative uses, you can transform your videos into visually stunning masterpieces. Below are nine creative ways to use adjustment layers, numbered for better clarity and structure, to help you enhance your videos.
1. Simulate a Time Transition (Day-to-Night Effect)
Create a dramatic shift from day to night using adjustment layers:
- Apply a Lumetri Color effect to an adjustment layer and decrease the exposure to simulate darkness.
- Add a blue tint by lowering the temperature slider to give the scene a cool, nighttime look.
- Use keyframes to gradually decrease highlights and whites as the sequence progresses.
- Layer in animated stars or subtle light flares on additional layers for a more cinematic effect.
👉 Perfect for storytelling projects or creative short films showing the passage of time.
2. Add Dynamic Movement to Your Scene
Make your static footage come alive with creative movements:
- Apply a Transform Effect to the adjustment layer.
- Add keyframes to animate the position, scale, or rotation of your footage.
- Use the Directional Blur effect to smooth out rapid movements and make them more dynamic.
- Experiment with Posterize Time to give your footage a choppy, stop-motion effect.
👉 Ideal for fast-paced montages, music videos, or action scenes.
3. Create a Vintage Film Look
Transform modern footage into a nostalgic, vintage aesthetic:
- Add a Noise Effect to the adjustment layer to simulate film grain.
- Use Color Balance to shift colors slightly toward red and yellow for a retro vibe.
- Apply Gaussian Blur with a subtle radius to emulate old lenses.
- Overlay an animated film strip texture on top, using the Multiply blending mode for authenticity.
👉 Great for creative intros, storytelling projects, or travel videos.
For even more creative control over movement and transitions, check out this tutorial on how to reverse a clip in Premiere Pro.
4. Highlight Specific Areas with Masking
Draw your audience’s attention to specific parts of your video:
- Add a mask to the adjustment layer and shape it as a circle or rectangle.
- Apply a Lumetri Color effect to increase brightness, contrast, or saturation within the masked area.
- Feather the mask edges for a soft transition to surrounding footage.
- Animate the mask path to track a moving subject in the scene.
👉 Perfect for tutorials, product showcases, or highlighting key moments in your video.
5. Experiment with Lens Distortion
Add a creative twist to your footage with lens effects:
- Use the Lens Distortion Effect on an adjustment layer.
- Adjust the curvature and decentering settings to create a unique distorted look.
- Pair with Vignette for a stylized vintage or fisheye effect.
- Add motion keyframes to animate the distortion for dynamic transitions.
👉 Works well for artistic projects, intros, or abstract music videos.
6. Stylized Slow-Motion Effects
Make your slow-motion clips stand out with creative tweaks:
- Apply a Directional Blur to the adjustment layer to emphasize motion.
- Use Tint to give the slow-motion clip a monochrome or custom color palette.
- Combine with Time Remapping to vary the speed of your footage.
- Add a subtle glow using Gaussian Blur to enhance the dreamy effect.
👉 Perfect for emotional scenes or high-impact moments in your project.
If you’re using adjustment layers to animate movement, you may also want to learn how to rotate a clip in Premiere Pro.
7. Create Custom Transitions
Use adjustment layers to design seamless transitions between clips:
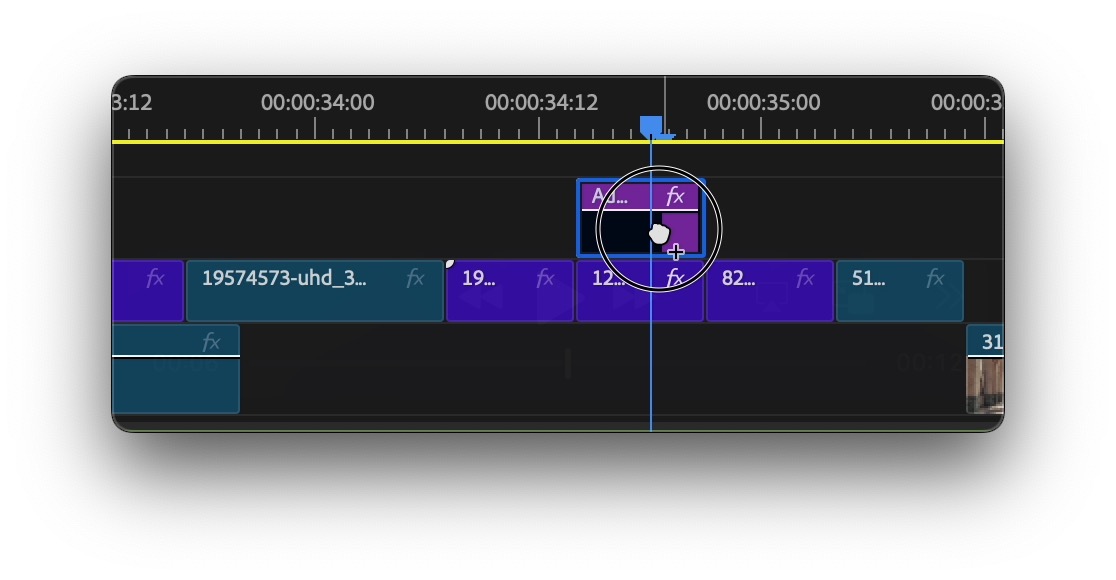
- Place an adjustment layer between two clips on your timeline.
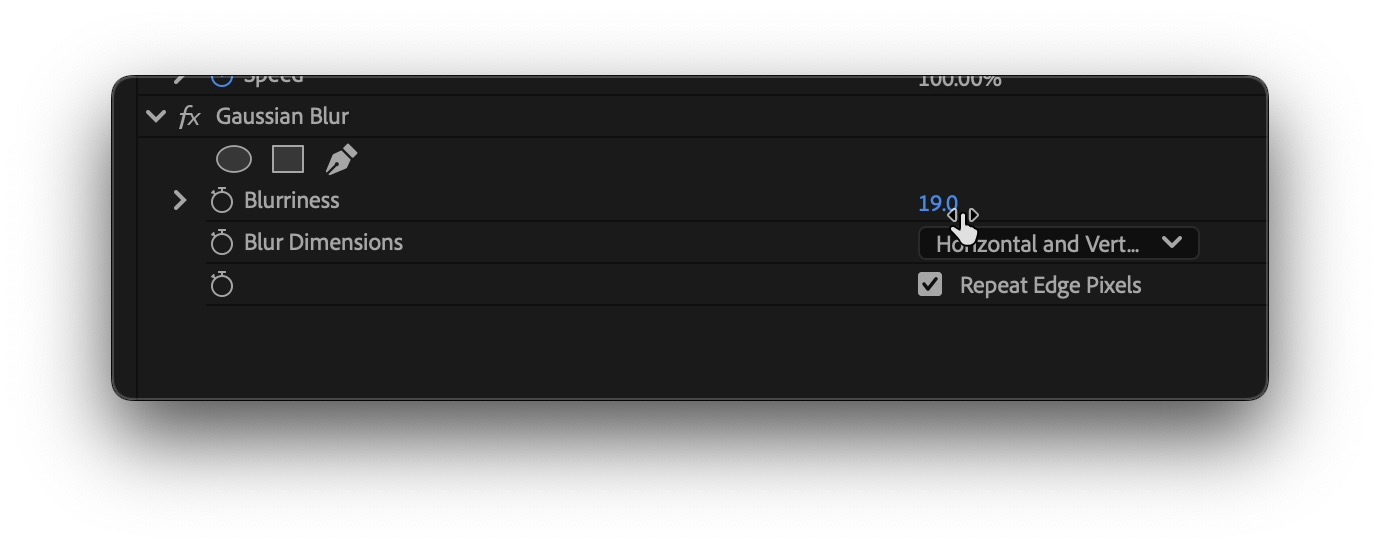
- Add a Blur Effect (e.g., Gaussian Blur) and animate its intensity to fade between the clips.
- Combine with a Color Gradient or RGB Split effect to create a unique, glitchy transition.
- Experiment with blending modes (e.g., Add or Overlay) to enhance the effect.
👉 Perfect for unique, professional-looking transitions in your videos.
8. Simulate Shadows and Highlights
Add realistic lighting effects to your footage:
- Use the Drop Shadow Effect on the adjustment layer.
- Animate the shadow's angle and distance to simulate changing light sources.
- Add a Glow Effect to mimic the appearance of reflections or light leaks.
- Combine with masking techniques to focus the shadow or highlight on a specific subject.
👉 Ideal for stylized shots or enhancing scenes with dynamic lighting.
9. Enhance Typography with Adjustment Layers
Bring text overlays to life with adjustment layers:
- Place an adjustment layer above your text in the timeline.
- Apply effects like Gradient Ramp or Glow to give the text more depth.
- Use the Shadow/Highlight effect to make text stand out in busy scenes.
- Experiment with Wave Warp or Distort Effects for animated, eye-catching text.
👉 Great for title sequences, lower thirds, or promotional videos.
By experimenting with these nine creative techniques, you can maximize the potential of adjustment layers in Premiere Pro. These tips will not only streamline your editing process but also add a unique, professional touch to your video projects.
Looking to master Adobe Premiere Pro and elevate your editing skills? Check out Miracamp's Adobe Premiere Pro Course for expert-led courses, hands-on projects, and personalized training to take your videos to the next level!
Tips for Using Adjustment Layers Effectively
- Stack Adjustment Layers: Use multiple layers for different effects (e.g., one for color grading, another for motion effects).
- Keep It Simple: Avoid overloading a single adjustment layer with too many effects. This can make troubleshooting difficult.
- Organize Your Timeline: Name your adjustment layers to keep track of their purpose. For example, “Color Grading” or “Motion Effects.”
- Save Presets: Save frequently used effects and settings as presets for quicker application in future projects.
After applying your adjustment layers and final grading, make sure your final video looks perfect by learning how to export high-quality videos in Premiere Pro.
Common Mistakes to Avoid
- Not Matching Sequence Settings: Ensure the adjustment layer matches your sequence’s resolution and frame rate to avoid unexpected results.
- Overusing Effects: Too many effects on a single adjustment layer can slow playback and complicate editing.
- Ignoring Masks: Masks can help you control where effects are applied, making your edits more precise.
If your timeline becomes heavy after stacking multiple adjustment layers, here’s how to speed things up by learning how to render in Premiere Pro.
Conclusion: Master Adjustment Layers for Professional Results
Mastering adjustment layers in Premiere Pro is a game-changer for video editors. Whether you're creating consistent color grades, applying motion effects, or experimenting with blending modes, adjustment layers simplify your workflow and enhance your creative potential.
Ready to take your editing skills to the next level? Join Miracamp's Adobe Premiere Pro Course and learn from industry professionals. From mastering adjustment layers to advanced techniques like keyframing and masking, our courses are designed to help you create professional-level videos with confidence.
FAQ
What is an adjustment layer in Premiere Pro?
An adjustment layer in Premiere Pro is a special layer you place above your video clips in the timeline to apply effects or color grading across multiple clips without affecting each one individually.
How do I create an adjustment layer in Premiere Pro?
Go to File > New > Adjustment Layer, ensure it matches your sequence settings, and click OK. Then drag it into your timeline above the clips you want to affect.
What are adjustment layers used for in Premiere Pro?
Adjustment layers are used for applying effects, transitions, and color corrections to multiple clips at once. They help keep your timeline organized and make bulk edits easier.
Can I add multiple effects to one adjustment layer in Premiere Pro?
Yes, you can apply multiple effects such as color grading, blurs, and transitions to a single adjustment layer. All clips beneath it will inherit those effects.
Do adjustment layers affect audio in Premiere Pro?
No, adjustment layers only affect video tracks. They do not impact audio. For audio effects, apply them directly to audio clips or audio adjustment layers in the audio track mixer.
Can I keyframe effects on an adjustment layer?
Yes, you can animate and keyframe any effect applied to an adjustment layer just like you would on a regular clip.
Do adjustment layers increase render time in Premiere Pro?
If you apply multiple heavy effects, they may slightly increase render time, but adjustment layers are highly efficient and help keep your workflow cleaner.
How do I use adjustment layers for transitions in Premiere Pro?
Place an adjustment layer across the cut between two clips, apply a transition or effect (like blur or zoom), and keyframe it for a smooth, stylized transition.
Can I stack multiple adjustment layers in Premiere Pro?
Yes, stacking multiple adjustment layers allows you to separate types of effects (e.g., one for color, one for blur). The top layer takes visual priority in the stack.
Where can I learn to use adjustment layers professionally?
Join the Adobe Premiere Pro Course by Miracamp to learn how to use adjustment layers for cinematic color grading, transitions, and pro editing workflows.


